
 Searching Printer by IP Address or Host Name During Setup

If the printer cannot be found on the Detect Printer screen, the Start Printer Connection screen appears.
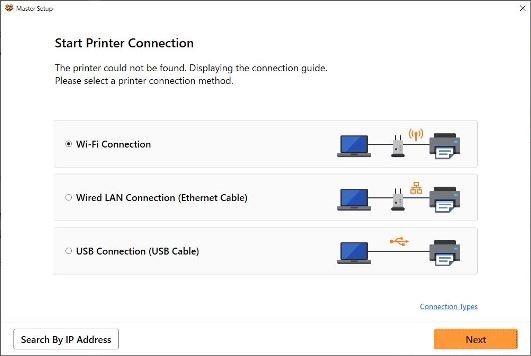
The Windows screen is used as an example above.
Clicking Search By IP Address allows you to search for a printer by specifying the IP address or host name of the printer.
-
Check printer's IP address or host name.
To check the printer's IP Address or host name, print out the network settings information or use the operation panel to display it.
-
Display on the touch screen.
-
Print the network settings.
 Note
Note- If you use the printer in an office, ask the network administrator.
-
-
Specify searching method.
Select one of the methods below.
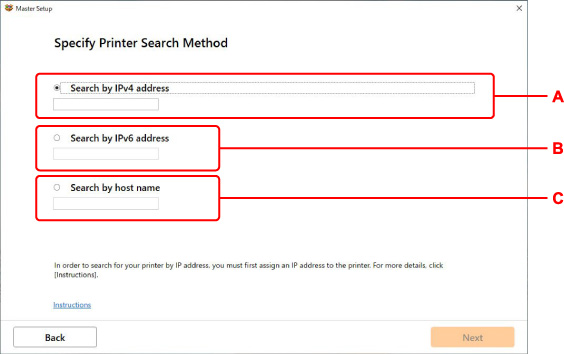
The Windows screen is used as an example above.
- A: Search by IPv4 address
- Select to search for printers by IPv4 address.
- B: Search by IPv6 address
- Select to search for printers by IPv6 address.
- C: Search by host name
- Select to search for printers by host name. A host name is referred to as LLMNR host name or Bonjour service name.
-
Enter IP address or host name and click Next.
Printer search starts.
If an error screen appears:
Resolve the error according to the instruction on the screen.
If the IP address you entered is already used for another device, follow the procedure below to specify printer's IP address.
-
Select
 (Setup) on HOME screen.Note
- If User management settings is enabled, the user selection screen is displayed before the HOME screen is displayed.
-
Select Printer settings
-
Select LAN settings
-
Select Wi-Fi
-
Select Advanced
-
Select TCP/IP settings
-
If you specify IPv4 address:
-
Select IPv4.
-
Select Yes on the displayed screen.
-
Select IP address.
-
Select Manual setup.
Selecting Auto setup specifies the IP address automatically.
Note- If warning screen is displayed, check the message and select Yes.
-
Enter IP address.
-
Select OK.
-
Enter subnet mask.
-
Select OK.
-
Enter default gateway.
-
Select OK.
The IPv4 address has been specified.
-
-
If you specify IPv6 address:
-
Select IPv6.
-
Select Yes on the displayed screen.
-
Select Enable/disable IPv6.
-
Select Enable.
The IPv6 address has been specified.
-
 Important
- If firewall is enabled on the computer, printers on a different subnet may not be detected. Disable firewall.
-
If firewall interferes with printer search:
The operating system installed on your computer and the firewall function of the security software may unintentionally prevent communication for setup. Check if a firewall message appears.
-
If a firewall message appears:
If a firewall message appears warning that Canon software is attempting to access the network, set the security software to allow access.
After allowing the software to access, return to setup and follow the instructions on the screen.
-
If no firewall message appears:
Temporarily disable the firewall and return to setup and follow the instructions on the screen.
After the setup is complete, re-enable the firewall.
![]() Note
Note
- For more on firewall settings of your operating system or security software, see instruction manual or contact its manufacturer.
